Solid wood floors are great and come with many advantages for several reasons, but the main one out of them being the ability to make them look like just installed when they start to get dull, tired, sad and scratched. The process of achieving that look is called refinishing and it includes a few quick and easy procedures that breathe new life into your solid wood floors and bring back their initial glory, beauty and good condition. That is right, refinishing is beneficial and recommended not only for the improvement of the look and appearance but also for improvement of the overall condition because during the process some of the main and most common solid wood issues are removed and additional protection is added. Overall, refinishing can happen up to 7 times in the life of your floor, it all depends on its age, condition, and previous treatments.
Solid wood floors are made from one piece of wood, which makes them very durable and long-lasting. If maintained and re-finished properly, they can last up to 100 years not losing a bit of their flawless look and solid condition over the years. Because of that, you would like to invest a bit now and then and maintain them properly to keep their condition and look up to date and flawless. Overall, solid wood refinishing is required mainly when you notice that the protective finish has worn off, which means that the bare wood underneath is exposed to an aggressive environment, moisture, high traffic and any other issues. In this case, solid wood refinishing will not only get rid of the existing issues and imperfections but also take care in the long term adding protection and preservation.
We would like to share with you a simple and easy step-by-step instruction, which will help you understand your solid wood floor better and take care of its needs and requirements.
Floor sanding is an essential step of any refinishing process. Usually sanding is recommended to be done by professionals for the final effect to be the best. However, you can attempt to DIY it and rent a sanding machine from your local provider. Overall, sanding means taking off the top layer of the worn finish. It is not a rare thing for bare wood underneath to experience issues like scratches, discolouration, etc. In case you notice some of those, be sure to contact your local sanding provider. Otherwise, sanding has to provide your floor with a smooth surface, and evenness and prepare wood for the upcoming procedures.
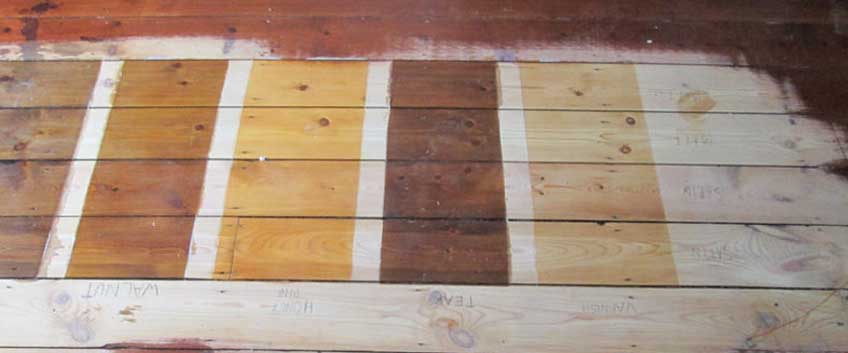
Wood floor staining is an optional procedure, however, if you consider staining, this is the right moment because after sanding the pores of the wood are open and the stain or dying product will soak into and ensure an even and uniform cover once the surface is completely clean after the sanding process. Test the stain on a small and hidden area first and if you are happy with the result, go ahead and add the shade of your choice to the whole surface.
Finishing, also known as floor sealing, is the final and very important step because it adds the protection needed and preservation of the colour and texture. Overall, you have a large choice with finishes and the desired effect, however, we would recommend polyurethane finish, because of its hard-wearing power, long-lasting effect and gloss that looks great and compliments any style and any space.